This isn’t so much a “how I did it post” so much as an answer to a common question post.
A regular question on all the various places that N scalers gather to discuss the hobby centers around Kato’s double track curves. Actually, it’s usually less of a question and more of an exclamation –
I can’t get the track to line up on the double track curves, I’m going to grind the rails, this stuff is crap!
When I first started laying my track I was briefly in the same boat until I stumbled upon somebody else’s frustrated post on the issue and saw the solution in the comments.
In a nutshell, unlike any other type of track offered by Kato – it matters how you assemble the double track pieces.

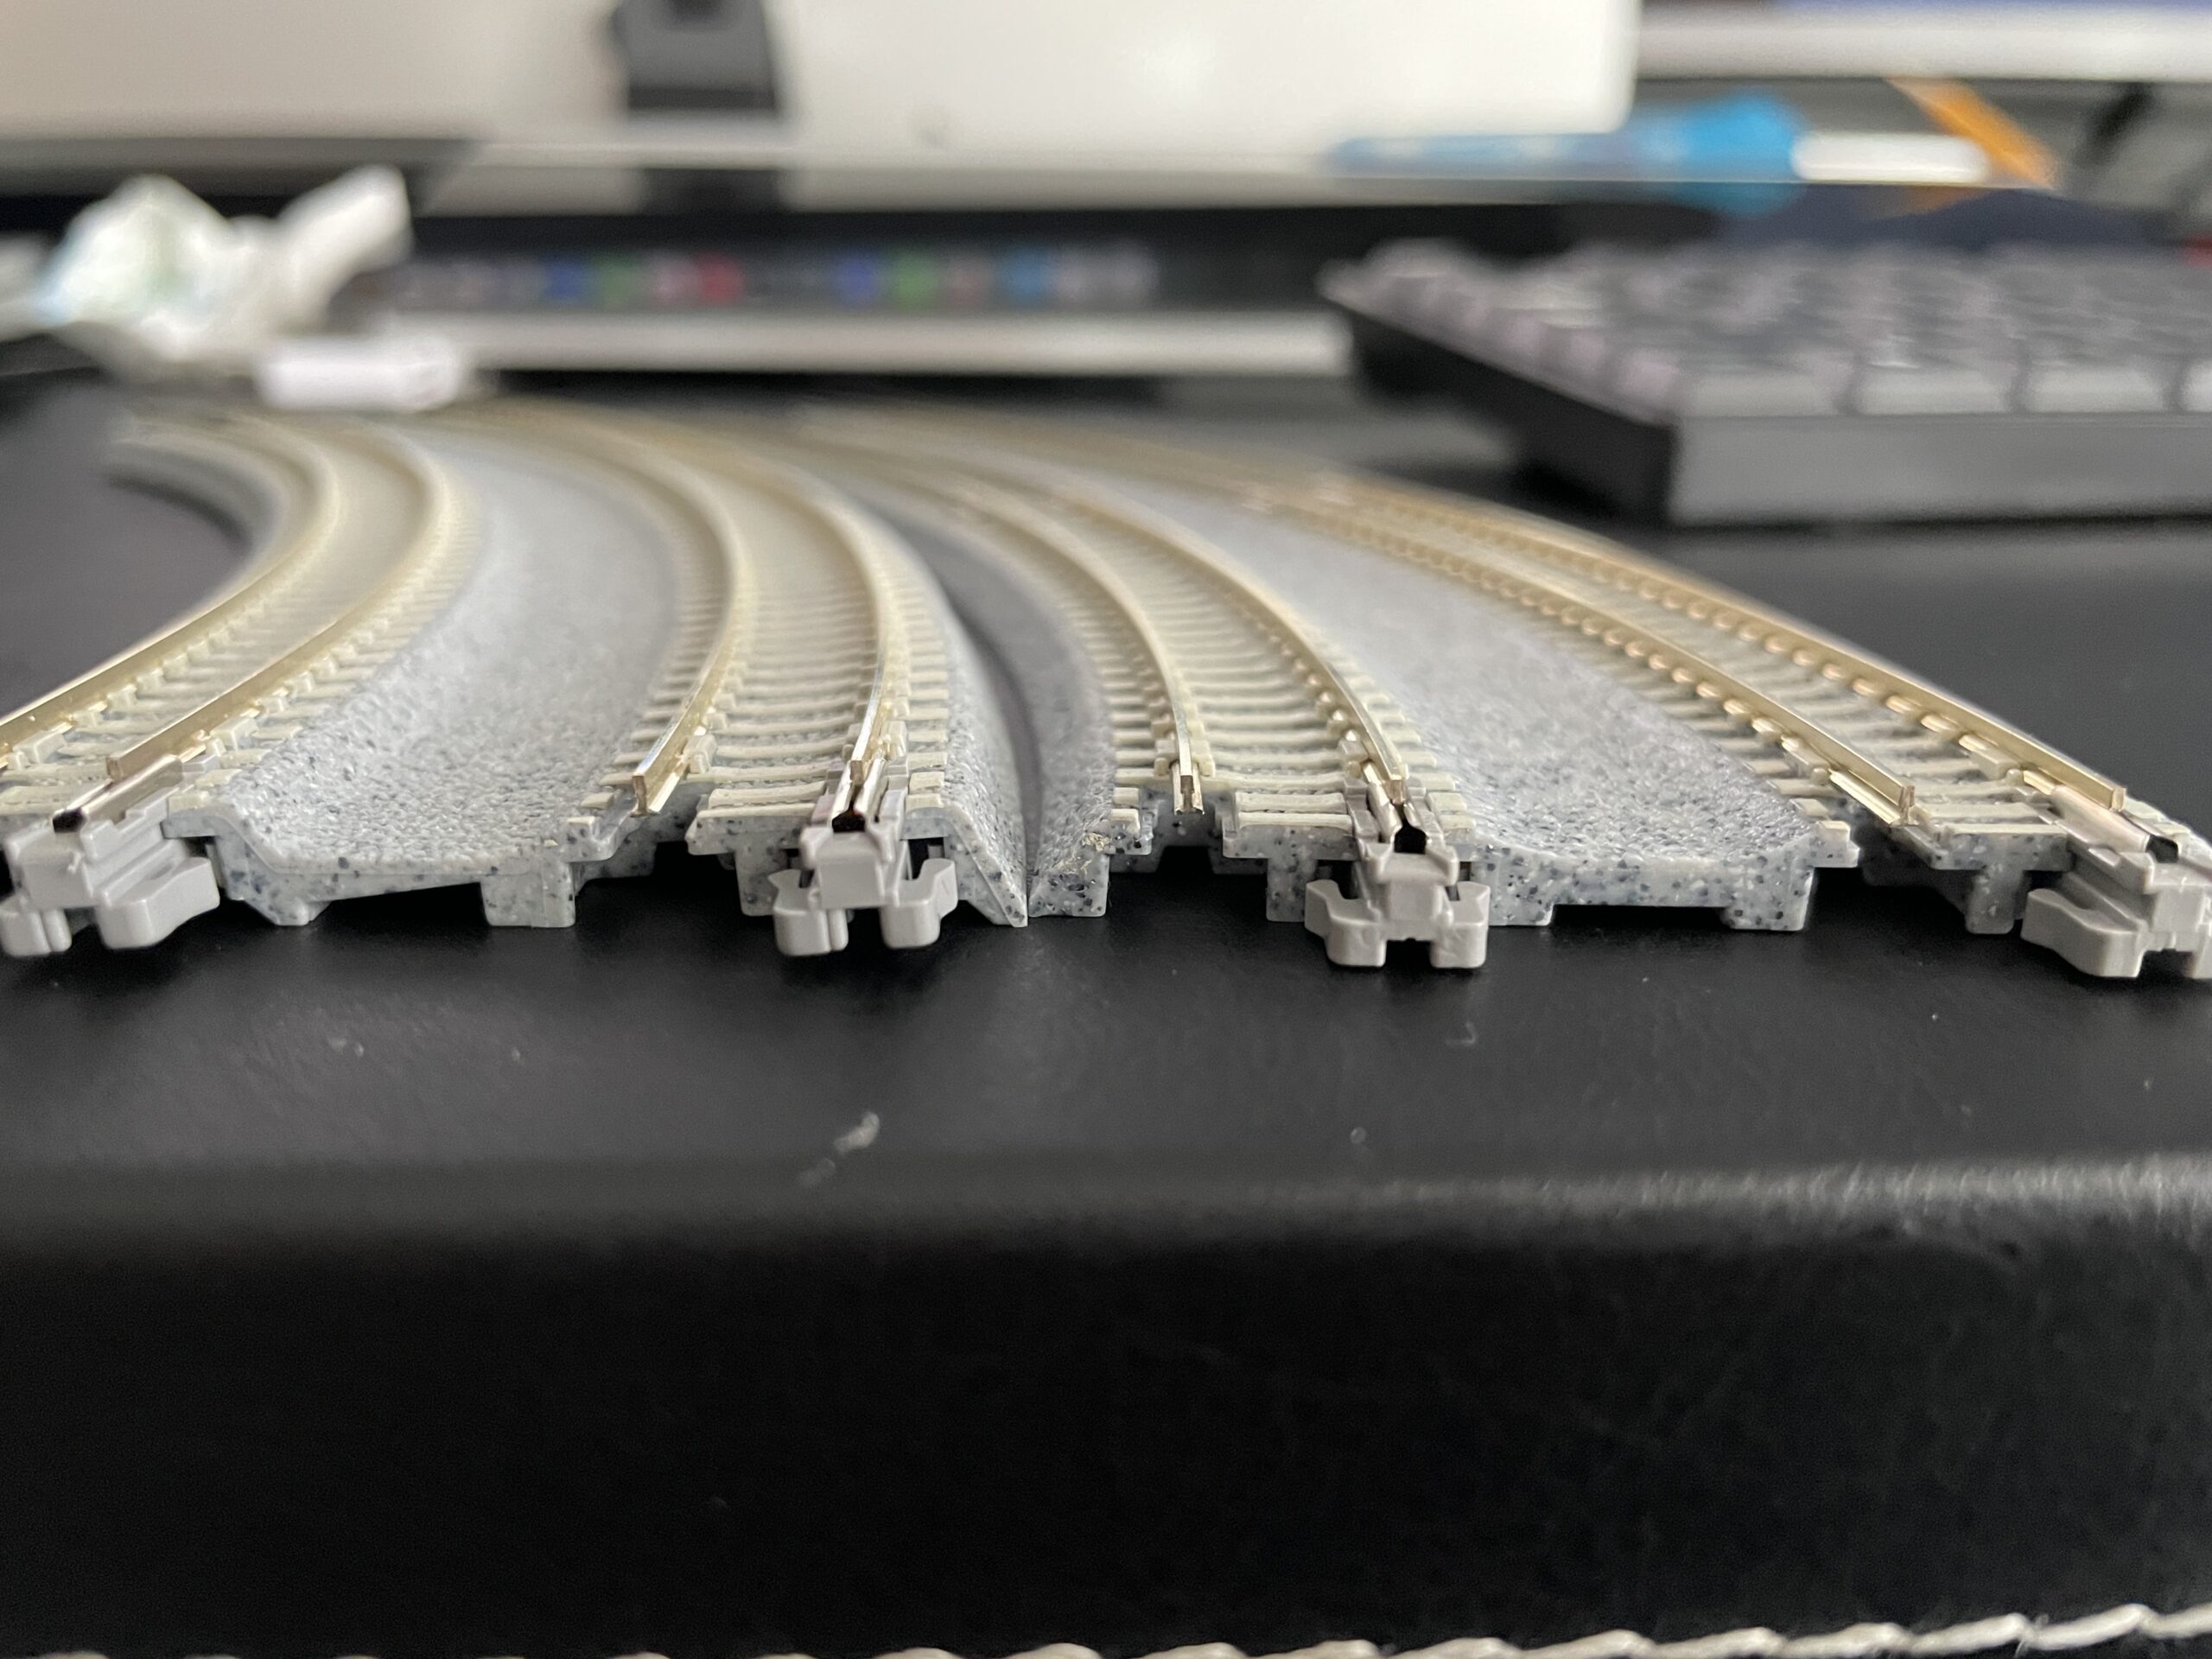
The picture above shows the issue. Look for the notches between the tracks – the track on the right has a flat notch, it should only be connected to straight track or to curved track with a matching flat notch on the same end you’re connecting to.
The track on the right has a slanted notch. It should only be connected to curves at the end with a matching slanted notch at the same end.
If you look closely you’ll also see that the track on the left is super elevated whereas the one on the right is not – that’s what the notches indicate, the super elevated end of the curve vs the flat end.
Do not connect the slanted notch end to the flat notch end as the tracks will not align and you’ll have problems. The track mismatch will cause problems that range from derailments to snags, to even cars launching themselves into the air.
More info on how to assemble the track can be found in the one place we never look – on the back of the package that the track comes in. Kato gives us all the info we need right there on the back of the package, we can read it before we even buy the pack of track… But I admit, like most modelers – I didn’t bother to do it until AFTER I stared having problems.
So hopefully this post helps you solve a problem that almost everybody has and should have avoided…
